
Cold conditions are difficult for newly hatched chicks to tolerate. For this reason, both the incubator and the brooder must provide a reliable heat source. After hatching, chicks usually remain in the incubator for up to 36 hours until they are fully dry. Once this stage is complete, they are transferred to a brooder, where they typically stay for around six weeks.
Choosing the correct heat lamp and managing it properly is essential. Questions often arise regarding the right heat level, lighting requirements at night, and safety precautions. The following guide addresses these concerns in a structured way.
Table of Contents
Heat Requirements Inside a Brooder
Temperature regulation in adult chickens is handled by their feathers. However, young chicks have not yet developed this ability, so external heat must be provided. The goal is to replicate the warmth that would normally come from a mother hen.
For chicks raised for egg production, a brooder temperature of approximately 95°F is recommended during the first week, along with 40–60% relative humidity. Broiler chicks generally require a slightly lower temperature of about 90°F. Each week, the temperature should be reduced gradually by around 5°F until the chicks are ready to leave the brooder.
By the sixth week, juvenile feathers are usually developed, and the temperature can be lowered to about 70°F. While these values serve as general guidelines, environmental conditions such as extreme heat or cold may require adjustments.
Monitoring and Adjusting Temperature
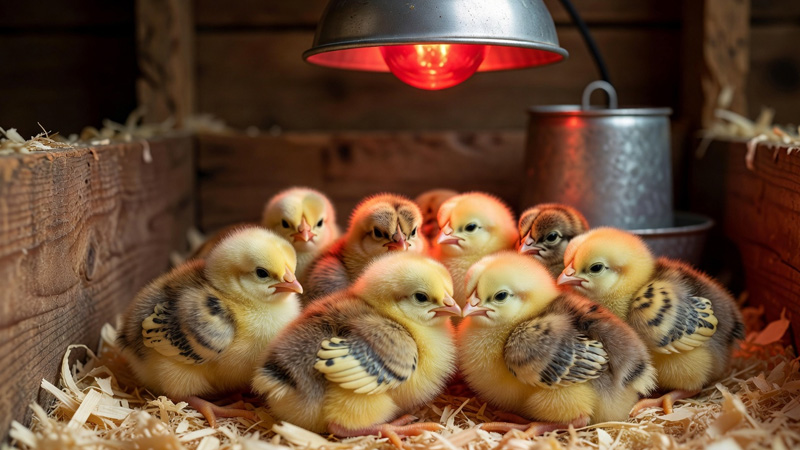
Chick behavior provides the most accurate indication of whether the brooder temperature is appropriate. When the environment is too hot, chicks tend to spread out, move away from the heat source, and may pant. In contrast, if the temperature is too low, they gather closely together beneath the heat source and produce louder chirping sounds.
Comfortable chicks remain active and evenly distributed throughout the brooder. To increase heat, the lamp can be lowered or a higher-wattage bulb can be used. To reduce heat, raising the lamp slightly is usually sufficient. Adjustments should always be gradual to avoid stress.
Choosing the Right Heat Lamp
Selecting an appropriate heat lamp is critical. Excessive heat can cause burns, while insufficient heat may lead to chilling. Additionally, some lighting systems present higher fire risks, so understanding different bulb types is important.
Incandescent vs Infrared Bulbs
Incandescent bulbs generate light by heating a filament, typically made of tungsten. Infrared refers to a form of radiation that produces heat with minimal visible light. In practice, many heat lamps combine both properties, emitting heat along with a small amount of light.
For brooders, a moderate level of light is beneficial but should not be too intense. Incandescent-based heat lamps are commonly used because they provide both warmth and gentle illumination. Lower-wattage bulbs are often sufficient for small brooders.
Fluorescent and LED Alternatives
Fluorescent and LED lights are more energy-efficient and longer-lasting than incandescent bulbs. However, they generate very little heat, making them unsuitable as primary heat sources for brooders.
Fluorescent bulbs also contain mercury, which poses a risk if broken. LEDs, while safe and efficient, are designed for lighting rather than heating. As a result, traditional heat lamps remain the preferred option for maintaining brooder temperature.
Setting Up Heat Lamps Safely
Proper installation is essential to prevent accidents. Heat lamps can reach very high temperatures, and incorrect placement may lead to fire hazards.
Lower-wattage bulbs are generally safer for small groups of chicks, while larger brooders may require multiple heat sources. Infrared lamps are available in red and clear versions, with red lamps often preferred because they reduce pecking behavior and provide softer lighting.
The lamp should be positioned approximately 12–18 inches above the chicks, depending on the required temperature. It must be securely suspended and adjustable, allowing height changes without risk of falling.
Using Heat Lamps at Night
Unlike chicks raised by a hen, brooder-raised chicks depend on artificial heat continuously. Heat lamps should remain on during the night to maintain stable temperatures. While light is not essential, complete darkness combined with insufficient heat can stress chicks.
The lighting should remain dim rather than bright to avoid disturbing their natural rest patterns.
Fire Safety Guidelines
Heat lamps present a known fire risk if not handled correctly. Many incidents occur due to falling lamps or contact with flammable materials. The following precautions help reduce risk:
- Use moderate-wattage bulbs instead of excessively high-powered ones.
- Select durable, high-quality lamp fixtures.
- Inspect power cords regularly for wear or damage.
- Secure lamps with additional supports such as cable ties.
- Use heat-resistant sockets, preferably porcelain.
- Avoid flammable materials like cardboard or untreated wood near the brooder.
- Install a protective screen above the brooder.
- Keep the surrounding area clear of combustible items.
- Place the brooder in a well-ventilated, separate space when possible.
- Check the setup regularly, especially before leaving it unattended.
Conclusion
Heat lamps are a fundamental component of a brooder system. Their primary purpose is to provide consistent warmth rather than strong illumination. Proper selection, correct positioning, and continuous monitoring ensure that chicks remain healthy and safe.
By maintaining stable temperature conditions and following safety practices, the risk of fire and health issues can be minimized while supporting optimal chick development.

