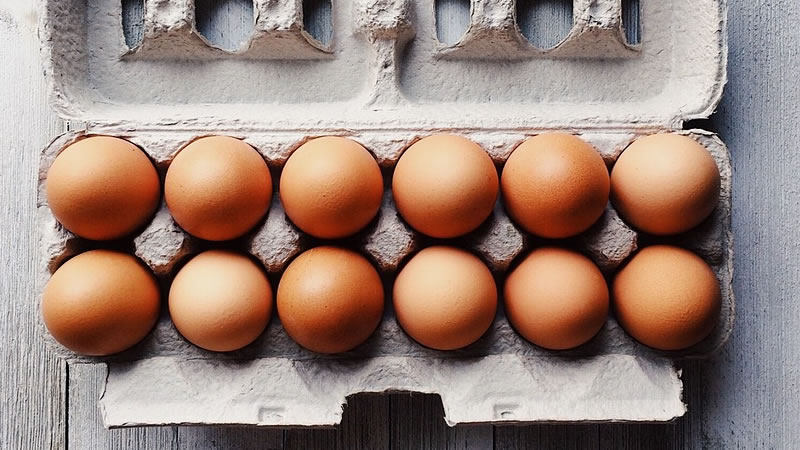
If you want to raise chicks from your own flock, the journey starts with fertile eggs.
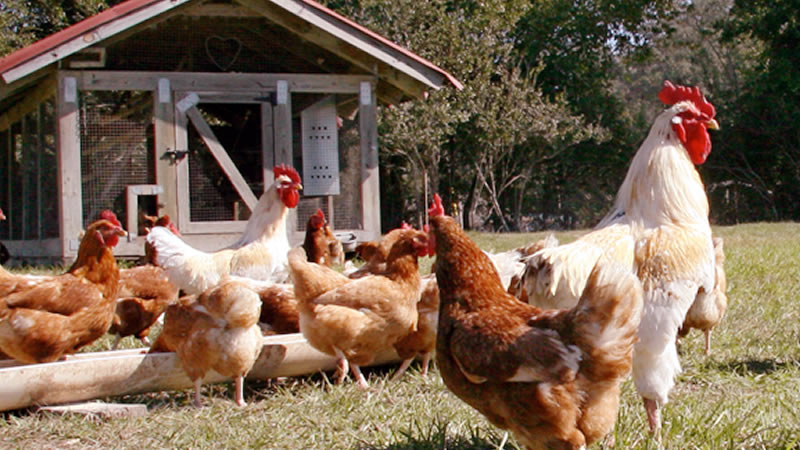
In a natural setup, a broody hen will sit on the eggs, keep them warm, turn them regularly, and protect them until they hatch. That sounds easy, and honestly, it is one of the most beautiful things to watch in chicken keeping.
But not every hen goes broody. Some hens simply lay eggs and walk away. In that case, you will need an incubator to hatch the eggs properly.
Chicken egg incubation can feel intimidating for beginners because temperature, humidity, turning, and timing all matter. A small mistake may reduce your hatch rate. But once you understand the process, it becomes much easier to manage.
This guide explains the complete chicken egg incubation process, including how to choose fertile eggs, prepare your incubator, control temperature and humidity, candle eggs, handle lockdown, and care for newborn chicks.
Table of Contents
- What Is Chicken Egg Incubation?
- Why Temperature Is So Important During Incubation
- How to Calibrate Your Incubator Thermometer
- Why Humidity Matters During Incubation
- How to Check If Eggs Are Fertilized
- How to Choose the Best Eggs for Incubation
- How to Prepare Eggs Before Incubation
- How to Choose the Right Egg Incubator
- How to Prepare the Incubator
- How to Incubate Chicken Eggs Properly
- How to Calculate Hatch Day
- How to Care for Newly Hatched Chicks
- Should You Help a Chick Hatch?
- Conclusion
What Is Chicken Egg Incubation?
Incubation is the process of keeping fertilized eggs under the right conditions until chicks develop and hatch.
During incubation, the embryo inside the egg slowly grows with the help of proper warmth, humidity, oxygen, and regular egg turning.
For chicken eggs, incubation usually takes about 21 days. Some eggs may hatch a little earlier or later depending on breed, temperature consistency, and egg condition.
The goal is to copy what a broody hen naturally does. A good incubator keeps the eggs warm, maintains the correct moisture level, and allows the embryo to develop safely inside the shell.
Why Temperature Is So Important During Incubation
Temperature is one of the most critical parts of chicken egg incubation.
If the incubator temperature is too low, embryo development slows down. Chicks may hatch late, become weak, or fail to hatch at all.
If the temperature is too high, embryos may develop too quickly. This can cause deformities, early death, or chicks that hatch weak and unhealthy.
For most forced-air incubators, the ideal temperature is around 99.5°F. A small range between 99°F and 102°F may still be acceptable, but keeping it stable is always better.
Still-air incubators, which do not have fans, usually require a slightly higher temperature reading because heat is not evenly distributed inside.
How to Calibrate Your Incubator Thermometer
Before using your incubator, check whether the thermometer is accurate.
One simple way is the ice water test.
- Place ice cubes in a glass.
- Add a little water and let the ice begin to melt.
- Insert the thermometer into the ice water.
- The reading should be 32°F.
If the thermometer reads 33°F, it is one degree too high. That means you should adjust your target reading when using it inside the incubator.
If it reads 31°F, it is one degree too low.
Some thermometers can be calibrated manually. If yours cannot, you can still use it as long as you remember the difference and adjust your readings carefully.
Why Humidity Matters During Incubation
Humidity controls how much moisture the egg loses during incubation.
This is very important because the chick needs enough space inside the egg to position itself for hatching.
If humidity is too low, the egg may lose too much moisture. The membrane can dry out and shrink tightly around the chick, making it difficult or impossible to hatch.
If humidity is too high, the egg may not lose enough moisture. Too much liquid can remain inside the shell, and the chick may drown before or during hatching.
This is why humidity becomes even more important during the final days of incubation, also called lockdown.
How to Check If Eggs Are Fertilized
Only fertilized eggs can hatch into chicks.
If your hens are not kept with a rooster, their eggs will not be fertile. They are still perfectly fine for eating, but they will never develop into chicks.
There are two common ways to check fertility:
- Cracking an egg and checking the yolk
- Candling the egg without breaking it
A fertilized egg yolk has a small white mark called the germinal disc. It often looks like a tiny bullseye.
However, cracking the egg destroys it, so this method is only useful for checking sample eggs from the same flock.
Candling is the better method for eggs you want to incubate. It involves shining a bright light through the egg in a dark room to look for signs of embryo development.
How to Choose the Best Eggs for Incubation
Not all fertilized eggs are good candidates for incubation.
Some eggs may hatch poorly because of their shape, shell condition, age, or storage history.
A good hatching egg should be clean, strong-shelled, medium-sized, and properly oval.
Avoid incubating eggs that are:
- Too large
- Too small
- Pointed at both ends
- Round at both ends, except naturally round breeds like Marans
- Cracked
- Dented
- Wrinkled
- Thin-shelled
- Extremely dirty
- Very porous when candled
- Badly misshapen
Eggs with cracks or weak shells can allow bacteria to enter. Once contaminated eggs are placed inside an incubator, they may infect nearby eggs too.
For best results, choose eggs that are similar in size and age so development happens more evenly.
How to Prepare Eggs Before Incubation
Handle hatching eggs gently from the beginning.
Do not wash dirty eggs with water because washing can remove the natural protective coating called the bloom or cuticle.
This coating helps protect the egg from bacteria.
If an egg is only lightly dirty, you may gently scrape off dried dirt. Very dirty eggs are better left out of the incubator because they carry a higher risk of contamination.
Before incubation, store fertile eggs in a cool and dry place for up to 7 days. The ideal storage temperature is around 55°F to 60°F with moderate humidity.
Do not store hatching eggs in the refrigerator because cold temperatures can damage or kill the embryo.
Place eggs with the pointed end facing downward. This keeps the air cell in the correct position and helps the yolk stay properly centered.
While storing eggs, tilt or rotate them gently at least twice a day. This helps prevent the yolk from sticking to the shell membrane.
How to Choose the Right Egg Incubator
Egg incubators come in different sizes, designs, and price ranges.
Before buying one, think about how many eggs you want to hatch and how often you plan to use it.
Forced-Air Incubators
Forced-air incubators have fans that circulate warm air evenly around the eggs.
These are usually easier for beginners because temperature stays more consistent throughout the incubator.
Still-Air Incubators
Still-air incubators do not have fans.
Because warm air rises, temperature can vary between the top and bottom of the incubator. This makes careful monitoring more important.
Homemade or Conventional Incubators
Some chicken keepers build incubators from recycled materials such as foam coolers, old boxes, or small cabinets.
Homemade incubators can save money, but controlling temperature and humidity is harder. Hatch rates are often lower unless the setup is carefully designed.
Manual, Semi-Automatic, and Automatic Incubators
Manual incubators require you to turn the eggs by hand.
Semi-automatic incubators make turning easier but may still require some human involvement.
Fully automatic incubators turn eggs for you and usually provide better consistency.
For beginners, an incubator with a digital thermometer, hygrometer, and automatic egg turner is usually the easiest option.
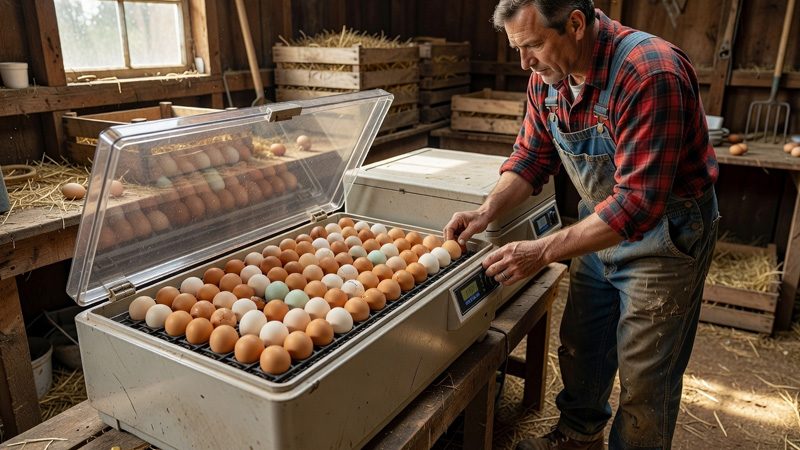
How to Prepare the Incubator
Before placing eggs inside, clean and sanitize the incubator properly.
Then turn it on and let it run for at least 24 hours.
This test period helps you confirm that temperature and humidity remain stable before the eggs are added.
Place the incubator in a room where the temperature does not fluctuate too much. Avoid direct sunlight, drafts, and areas that become too hot or too cold.
A stable room makes it much easier for the incubator to maintain proper conditions.
How to Incubate Chicken Eggs Properly
Even with good equipment, a 100% hatch rate is rare. Many poultry keepers consider a 70% to 90% hatch rate very good when using eggs from their own healthy flock.
Here are the main steps to follow.
1. Mark the Eggs
If you are turning eggs manually, mark one side of each egg with an “X” and the opposite side with an “O.”
Use a pencil or non-toxic marker.
This makes it easy to track which eggs have been turned.
2. Weigh the Eggs
Weighing eggs is optional but useful.
During incubation, eggs should gradually lose moisture. By weighing them, you can monitor whether they are losing the right amount.
Ideally, eggs lose about 11% to 13% of their starting weight by lockdown, with 12% being a good target.
3. Set the Eggs
Place the eggs inside the incubator with the pointed end facing down.
For a forced-air incubator, keep the temperature close to 99.5°F.
For a still-air incubator, temperature is usually measured near the top of the eggs and may need to be slightly higher, around 101°F to 102°F.
During the first 18 days, humidity is commonly kept around 28% to 50%, depending on air cell development and local conditions.
4. Turn the Eggs Regularly
Egg turning prevents the embryo from sticking to the shell membrane.
Turn eggs at least three times per day from day 1 to day 18.
Turning an odd number of times daily, such as 3, 5, or 7 times, helps prevent eggs from resting on the same side every night.
Automatic incubators handle this for you, but you should still check that the turner is working properly.
5. Candle the Eggs
Candling lets you monitor embryo development without opening the egg.
Most chicken keepers candle eggs around day 7 and again around day 10 to 14.
A developing embryo usually appears as a dark spot with red, spider-like veins spreading around it.
If you see a blood ring or no development at all after several days, the embryo likely died or the egg was infertile.
Remove bad eggs quickly. Rotten eggs can explode inside the incubator and contaminate everything.
6. Begin Lockdown on Day 18
Lockdown starts on day 18.
At this stage, stop turning the eggs.
If your incubator has an automatic egg turner, remove it and place the eggs flat on the hatching surface.
Increase humidity to around 65% to 75% and keep the temperature stable.
Avoid opening the incubator unless absolutely necessary because sudden humidity drops can dry the shell membrane and make hatching harder.
7. Hatch Day
Most chicks hatch around day 21.
However, some may hatch slightly early or as late as day 22 or 23.
Once chicks begin pipping, resist the urge to open the incubator.
Hatching can take 24 hours or longer. Chicks often rest between stages, and this is normal.
Wait until chicks are fully hatched, dry, and active before moving them to the brooder.
How to Calculate Hatch Day
Counting hatch day can be a little confusing for beginners.
The day you place eggs in the incubator is not considered a full day until 24 hours have passed.
For example, if you set the eggs on May 1 at 6 AM, day 1 is completed on May 2 at 6 AM.
This means hatch day will usually fall around May 22 at 6 AM, not May 21.
How to Care for Newly Hatched Chicks
Before the chicks hatch, the brooder should already be prepared.
Move chicks to the brooder only after they are dry and active.
The brooder temperature should be around 90°F to 95°F during the first week.
After that, reduce the temperature by about 5°F each week until chicks are fully feathered.
Newly hatched chicks need:
- Warmth
- Clean bedding
- Fresh water
- Chick starter feed
- Good ventilation
- Protection from drafts and predators
Most chicks are ready to move to a coop when they are fully feathered, usually around 6 weeks old.
Should You Help a Chick Hatch?
You can help a chick hatch, but in most cases, you should not.
Hatching is slow for a reason. Chicks need time to absorb the yolk sac, adjust their breathing, and finish internal development.
Helping too early can cause bleeding, weakness, or death.
Assisted hatching may be considered only in certain situations, such as:
- The chick has pipped for 20 to 24 hours but has not progressed
- The chick is stuck during the zipping stage
- The membrane is visibly dry and tight
- The chick pipped at the wrong end of the egg
Even then, helping a chick hatch is delicate and risky. It should be done slowly, carefully, and preferably with guidance from an experienced poultry keeper.
Conclusion
Chicken egg incubation is exciting, but it also requires patience and close attention.
Temperature, humidity, egg turning, candling, and lockdown all play important roles in giving embryos the best chance to hatch.
For beginners, the key is preparation. Choose strong fertile eggs, use a reliable incubator, monitor conditions daily, and avoid rushing the process.
Once the chicks finally hatch, the long wait suddenly feels worth it.
With practice and consistency, incubating chicken eggs can become one of the most rewarding parts of raising chickens.